 Do you want to learn how to use an arpeggiator in your music productions?
An “arpeggio” means “broken chord”, and you can actually play this manually on your instrument. Let’s say you have a C Major chord, which are the notes C, E and G. Instead of playing them together, you play the notes one by one, in any sequence you like. You have now played an arpeggio.
The great thing about an arpeggiator, is that you can program it to convert your “block chords” into a running sequence. This is great for adding drive and rhythm to your music, and instantly create more variation and interest compared to long boring block chords.
How to use an Arpeggiator
Let’s have a look at the various main aspects of an arpeggiator plugin. Please note that not all arpeggiators will have every feature I list here.
Another thing to note is that you can either use an arpeggiator that is built into the instrument or synthesizer you use, or you can use an arpeggiator MIDI Effect that will send notes to the software instrument you have on the specific track.
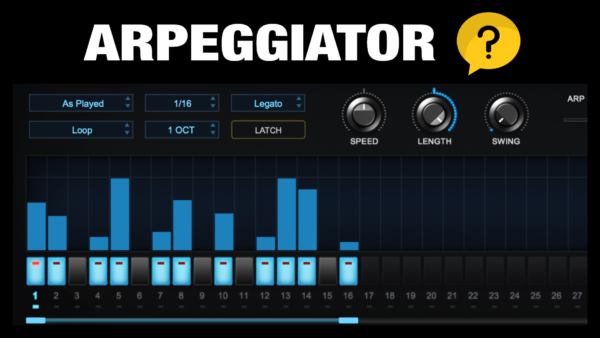
I will use the arpeggiator in the software instrument “Omnisphere” since it has the most feature rich arpeggiator I know of.
1 – Step Amount and Note Value
The first aspect of your arpeggiator is to choose how long the sequence will be, before it loops. And then you set the note length for each step. For example, 16 steps, with 16th note values. This will be 1 full bar, if your track is in 4/4 time.
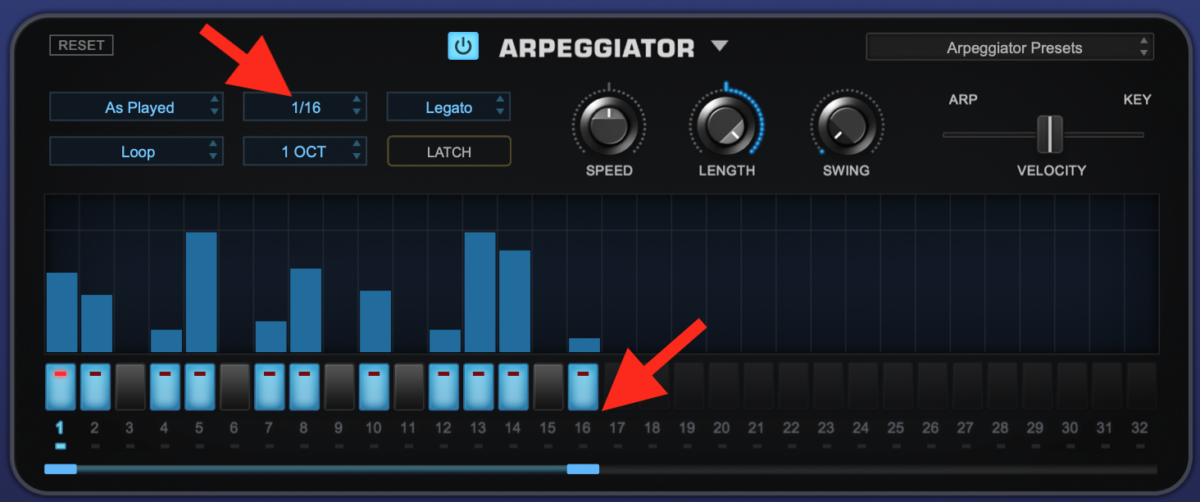
2 – Step Programming
Then you program the arpeggio rhythm, meaning which steps should trigger a note, and also how long each step should be. You can choose to “tie” steps together, and sometimes you can even increase or decrease the step length individually for more variation. You can also set the velocity level for each step, which can change the loudness (dynamics variation) per step in the sequence.

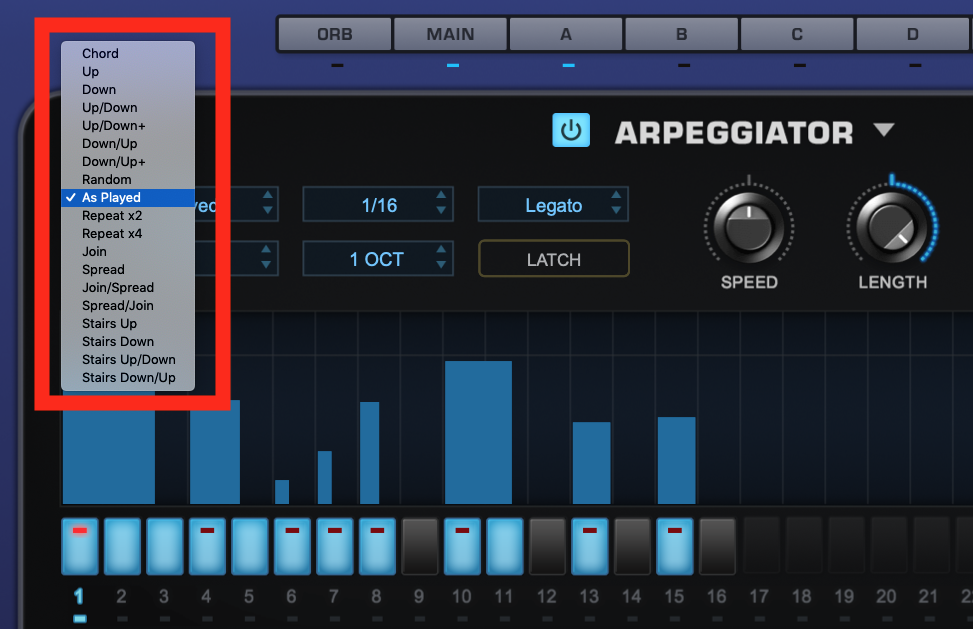
3 – Arpeggiator Mode
When you play a chord as a running sequence note by note, you can do so in various ways. For example, starting with the lowest note and then play each note to the top note, and then go down again. Or go in the other direction. Or perhaps start with the low, go to the high, then jump back to the lowest note and start over. With an arpeggiator you can set this “arpeggiator mode” for how it should trigger the notes when you hold down a chord.
You can even set it to “chord” to make a rhythm playing the entire block chord using the steps programming you created.
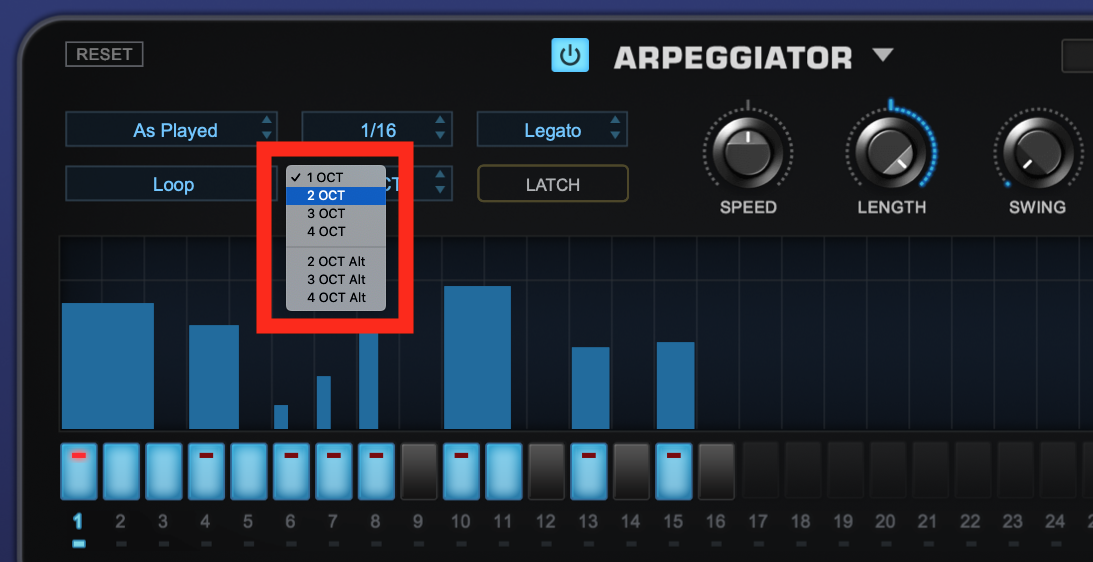
4 – Octave Range
Even if you hold a 3 note chord, you can set the arpeggiator to play the notes using more than the specific octave you play the chord within. This way you can have the arpeggio go up into higher octaves during the sequence.
5 – Step Variation (advanced)
If your arpeggiator supports it, you can add more variation by programming step variation. For example, transposing the pitch on specific steps. Or having some steps play the entire chord instead of one note of the chord. Or sub divide a step to create a “stutter”. By using step variation you can create infinitely more advanced arpeggiator patterns.

