Did you know that you can edit multiple MIDI regions in your Logic Pro X project?
Meaning that you can see all notes of your selected regions at the same time, which makes it easier to check rhythm, harmonies, accents etc. in your composition.
How to edit Multiple MIDI Regions in Logic Pro
It is actually very simple to edit multiple MIDI regions at the same time. You simply SHIFT-select several regions in your sequencer, and then click “P” to open up the piano roll editor.
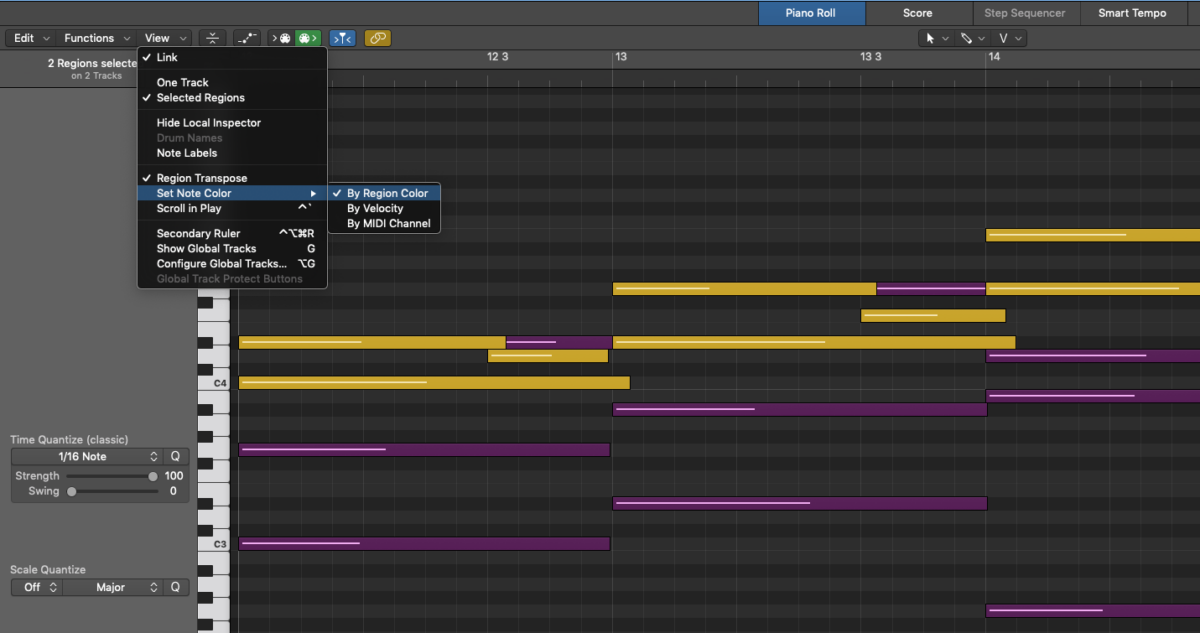
It’s the next step that is the real trick here. Because the problem with watching several regions at the same time is that it becomes a cluttered mess of notes, and it’s hard to see which notes are tied to which MIDI region.
The reason for this is that the default view of notes in the Piano Roll is “velocity”. This means the notes are colored based on their velocity level. What you want to do is to go up into the “view” menu, then to “see note color”, and choose “Per Region Color”. In order for this to work, you first need to make sure the each region you have selected have a different color in the first place.
Now you can see all notes, of all MIDI regions, and instantly be able to separate them by region. So let’s say you have selected 2 regions, 1 being a piano part and the other being a strings part. If you have colored them differently in the sequencer, you will now be able to separate the strings notes from the piano notes, by the color of the notes in the piano roll editor.
Bonus Tip: Some notes will be overlapped with notes from other regions, so you may want to quickly switch between watching the notes from a specific region, and then back to multi-view again.
You do this by double-clicking on any note in the piano roll, and that will “solo”-view that regions’ notes. Double-click again on any empty area in the piano roll and you will once again see the multi-view for all regions you have selected.