 Do you want create your own Kontakt Sample Libraries? For example like this Violin Swells Sample Library?
Create your own unique instruments for your own music productions, or even to sell to other music creators, so that you will make a nice profit from your work! =)
Before we start let’s think about why we might want to do that when there are so many other libraries you can buy from creators like myself.
- It can make instruments you own but cant play well, playable.
- Makes your pieces unique.
- Puts more of yourself into your pieces.
Now I’m not saying that we need to create highly polished instruments that are up to commercial standard, but we still need something playable. So this course will be designed to create something that is Playable, looks pleasing because I believe even a nice skin can inspire you when you work, and has some functionality.
Here is a free instrument I made that you can have, which also proves as a good example: Blowie-Ano – (melodica instrument)
Today we will be taking the first steps in that journey. warning, This is the boring bit… But we will do this in steps, so that it’s simple to see what we need to do.
Firstly, here’s a list of things you’ll need:
- Kontakt 5
- Izotope RX
- DAW
- Microphone (preferably condenser)
- Lead
- Audio Interface
- Computer
- An instrument or something that makes a noise
Things that are useful to have:
- Acoustic treatment
- Closed Back headphones (not totally necessary but good to have)
The instrument i will be sampling is a guitar that is bowed with a violin Bow. Quirky!
By the end of this series we will have created a brand new Sample Library instrument that YOU can download for free, and the best bit about it is this… you seen every single part of the process.
Sampling and setting up our sounds for export.
1. Set up your studio
- As you can see in this picture, I’ve set up two microphones on the instrument, and theres actually a room mic. I plugged everything in and made sure that the microphones were in phase with each other.
- In the end, I didn’t use the room mic, but the others i mixed together in varying degrees.
- when you have done this, i would then route your input to the corresponding channels in the DAW project.
2. Record Your Instrument
- In the picture you can see that I’ve essentially just recorded some longs all at once. its totally fine to do it like this and i actually suggest doing it like this, because we are going to export the file for clean up next.
- be sure to record your notes at 2/3 velocities, unless your wanting one softer instrument.
*record the same note 2/3 times at each velocity layers. these will become your round robins.
*Round robins are simply more iterations of the same note that you recorded. the more of these you have, the more natural your instrument will sound. i have chose to only include 2 round robins for the longs in this sound because that is all it needed. However, ive also included some shorts, which i have 4 round robins for.
- Top Tip – Record more than you need so that you can choose which recordings you want to keep at the end, especially if your not proficient on the instrument that you are recording.
3. Export Audio Files
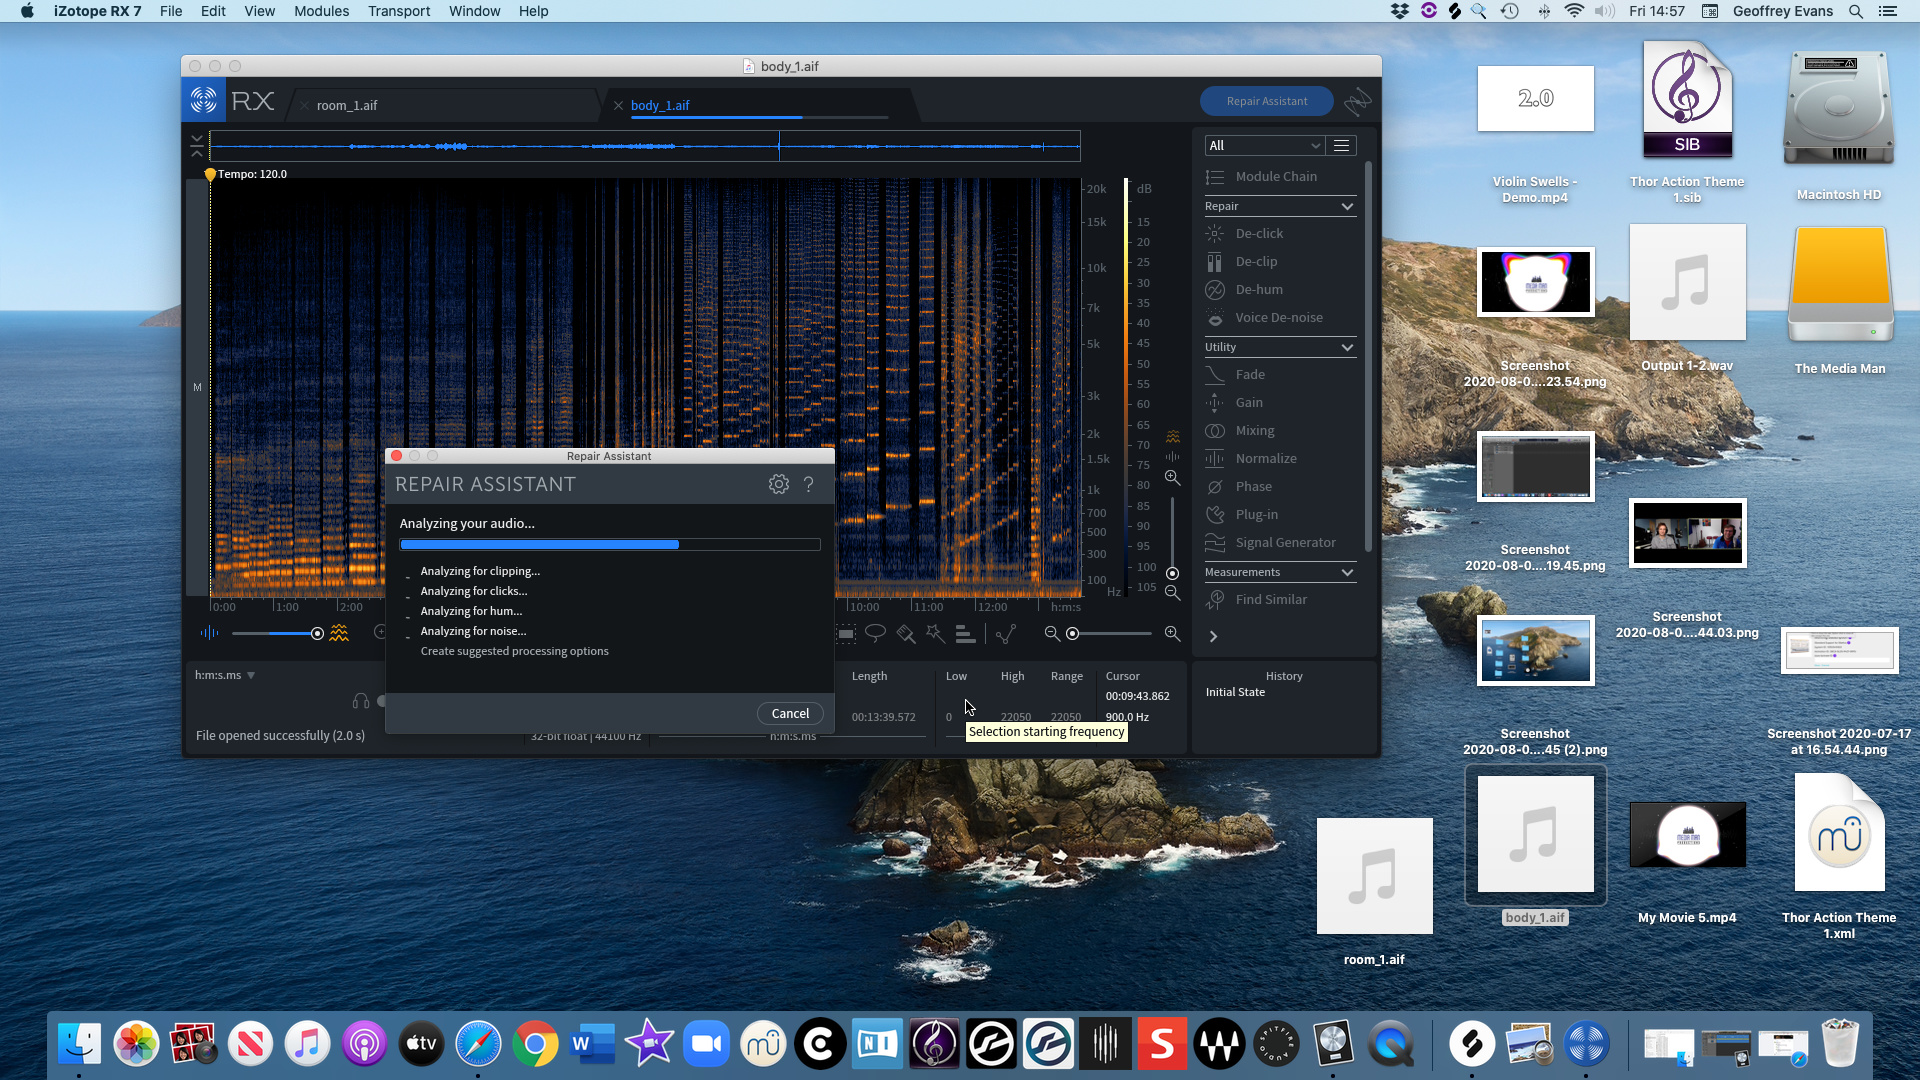
(please excuse my messy home screen)
- Now we have our samples recorded, export the one or two microphone stems that you have. it doesnt matter if there are mistakes in the files, those can be deleted later on.
- Load your exported files into Rx Elements. if you have the pro thats great too. Any will work. all we are doing is analysing with the voice de-noise plugin to reduce background noise. If you recorded your samples well then after this there shouldn’t be much background noise.
- Hint: on the spectrum screen, the blue is the background noise and the orange is your recorded instrument noise. if you take too much background noise out then your signal could be damaged, so be sparing. there shouldn’t be much background noise if you’ve recorded it well, the input of your recording signal doesn’t need to be loud at all.
4. Add them back into your project
And start to cut up the sounds at the start of each transient.
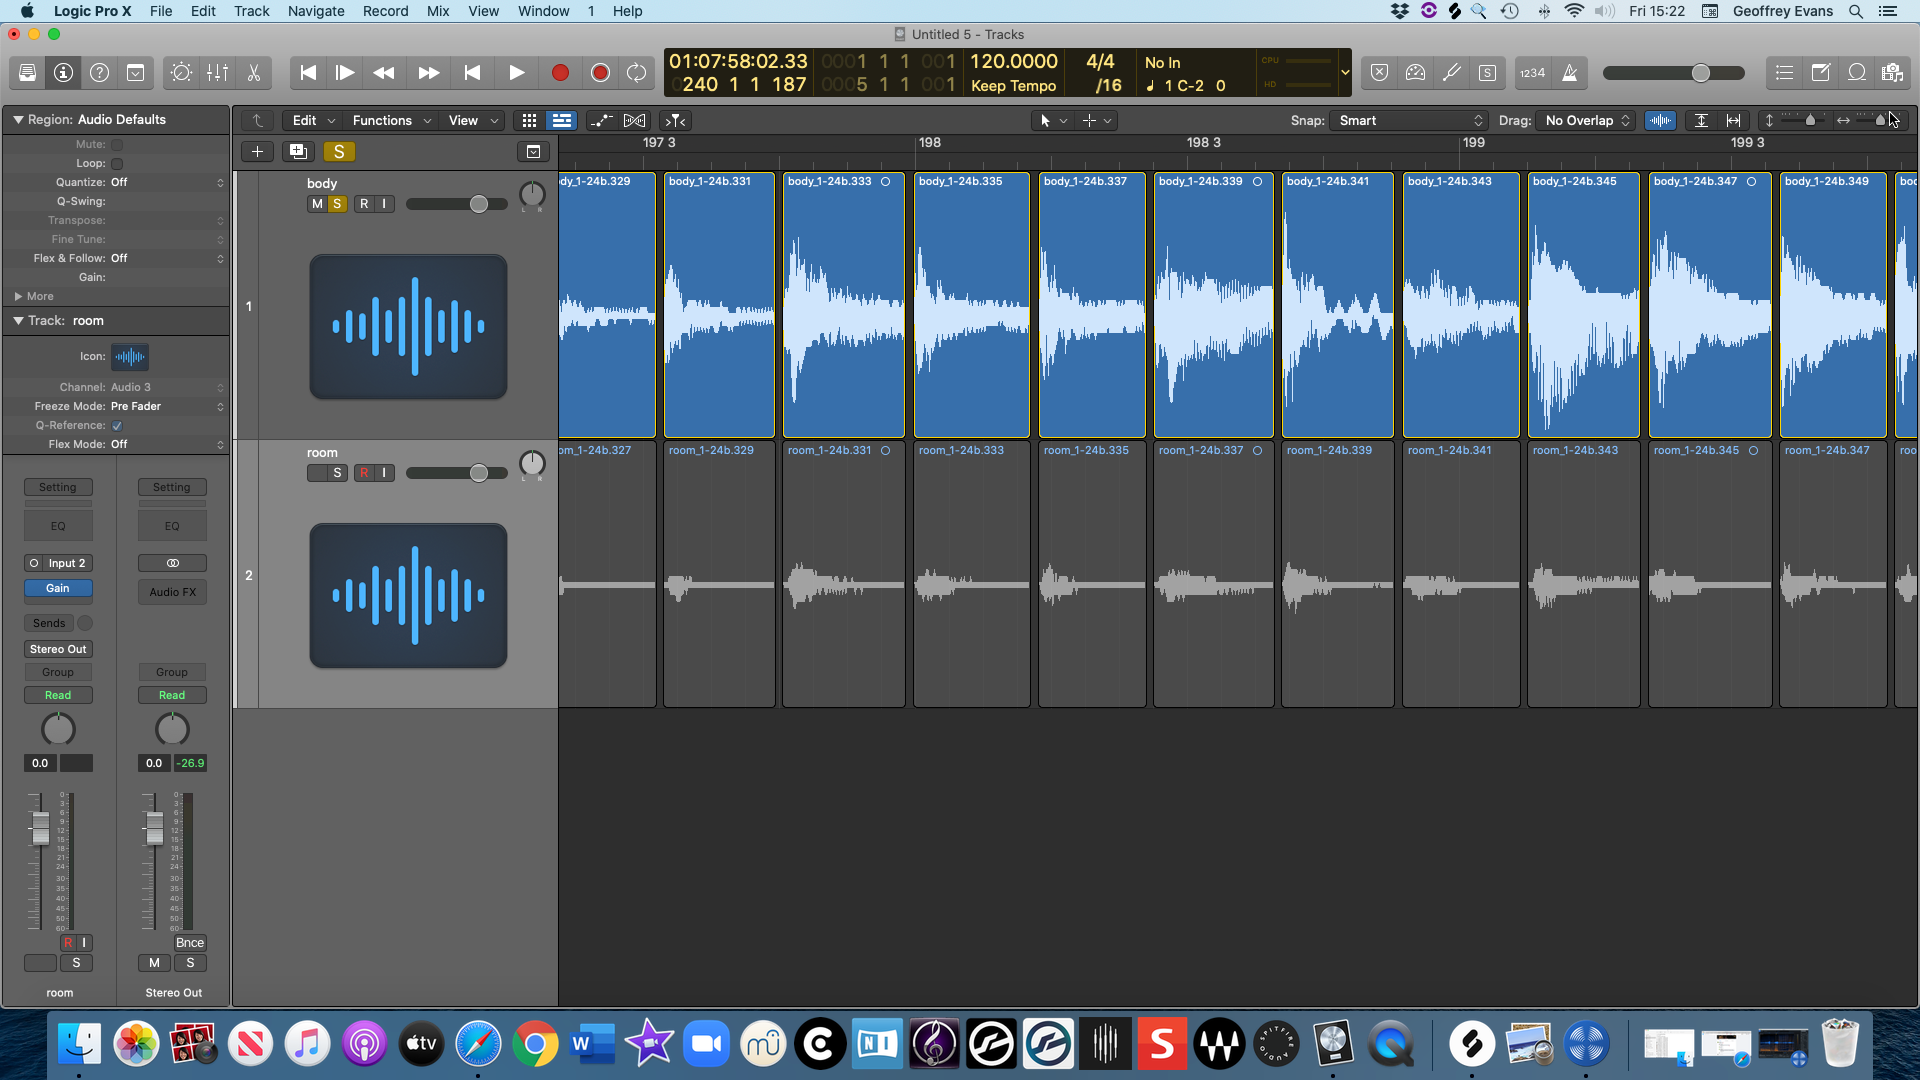
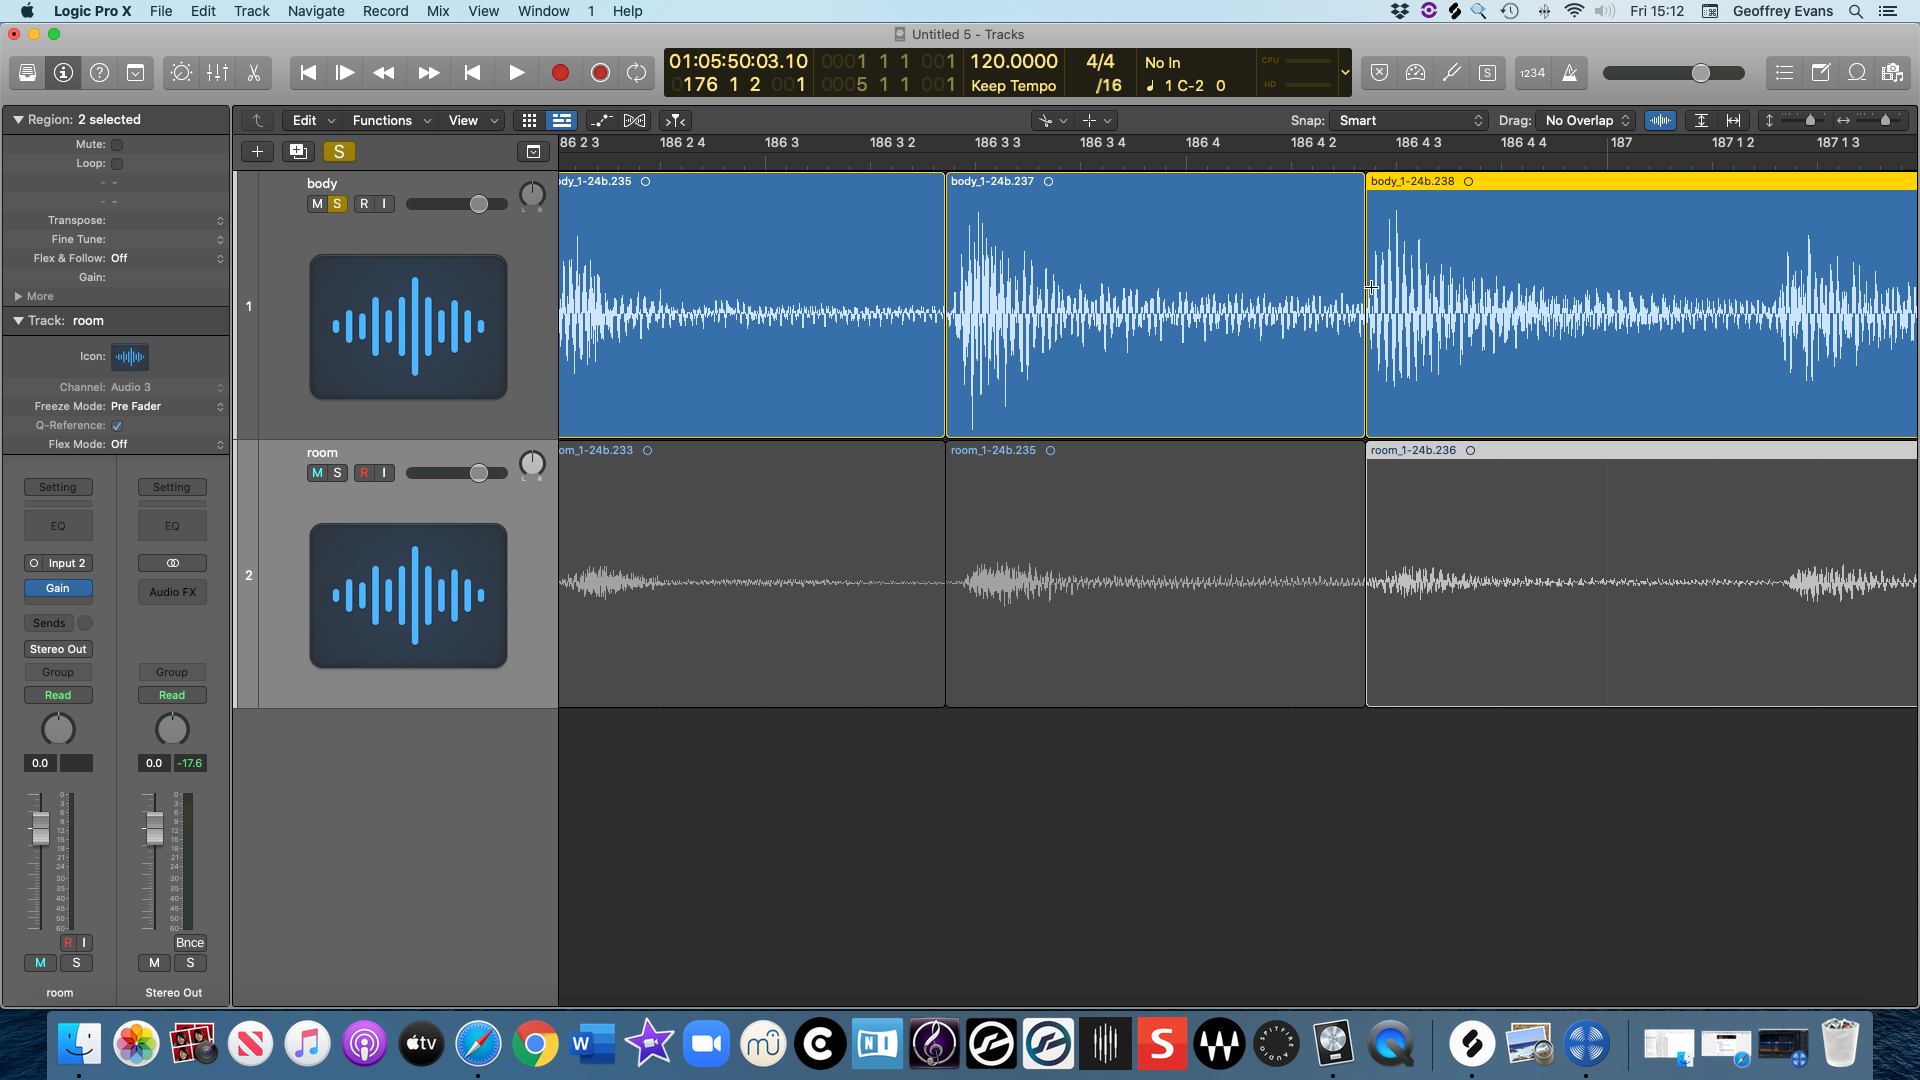
- This step takes a bit of patience… but when you are finished, highlight all notes and pull the ends of them back a few milliseconds and add a fade to the end. as seen in the picture above.
- Finally, add a 5ms fade to the start, just to avoid any pops in the audio.
5. Mix the Sounds
- go into your mix window and add an EQ, any frequencies that are odd, pull them out. add a high pass for everything over 30hz and if the sound is very bright then you might want to add a soft shelf ducking a few Db at the top.
you can add a small amount of compression if you want but its not needed so much. This can be done in the Kontakt Instrument.
6. Export all individual audio files
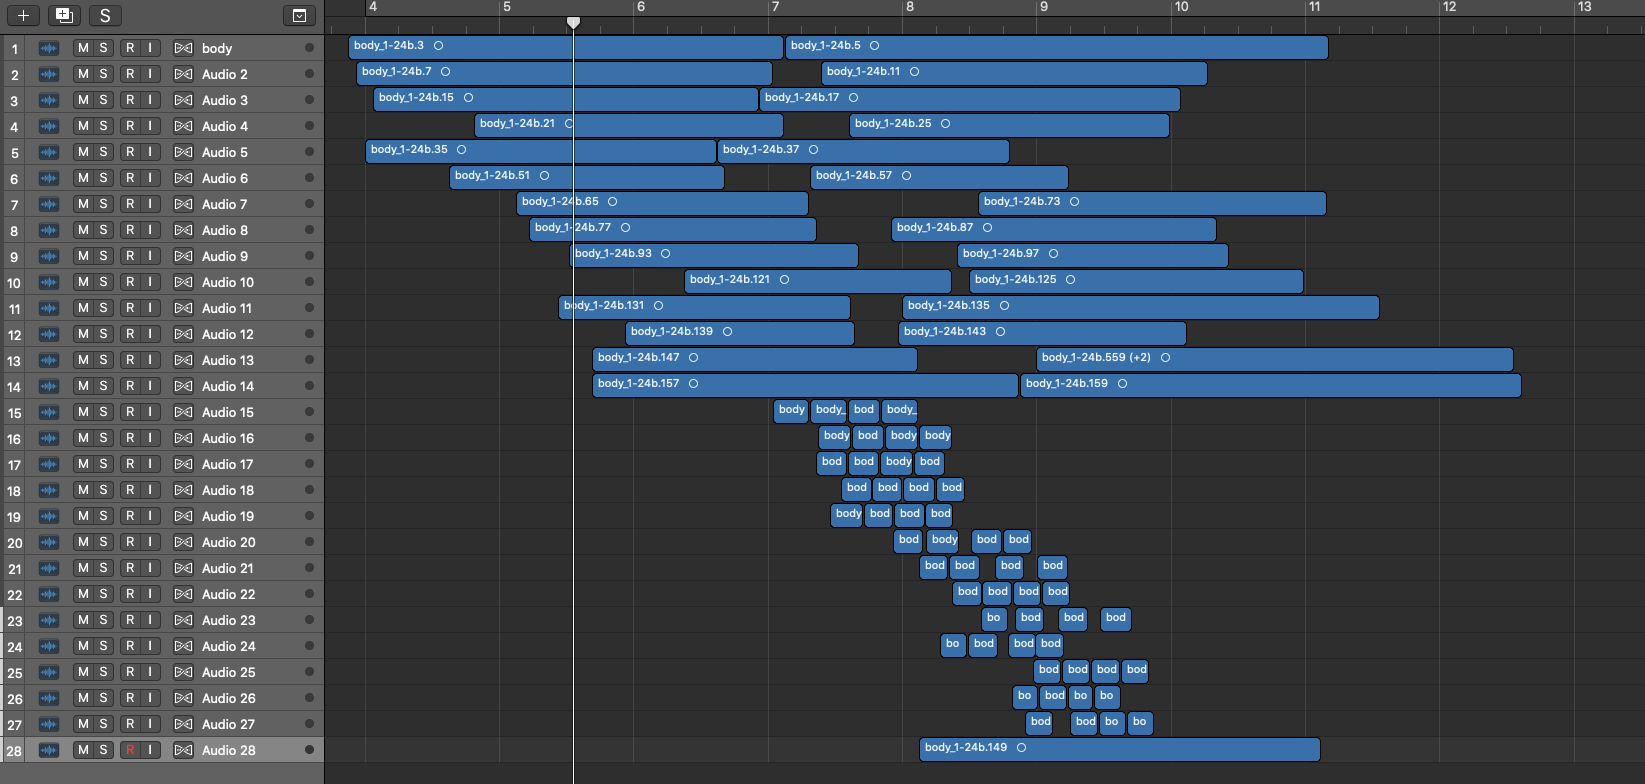
- Simply create a folder and in that folder add more round robin folders titled “Rr1, Rr2 etc. Now Bounce your tracks in groups. This is easier if you’ve moved your files into the groups they need to be in before bouncing. As you can see, I’ve separated all my sounds onto new tracks that can be easily selected for bounce. The first column is RR1 and the second is RR2.
- In my export folder, theres two folders Longs and shorts. and then inside them there are my RR’s. you don’t have to be as organised as this but I just find it a lot easier. I then go into the file and make sure everything is labelled with the note and octave that the file is playing. E.g. C1,D1,E1… etc.
Now that all of your files are recorded, and ready to be brought into the Kontakt window.
PHEW!
Well, we got through that didn’t we?!
This is the longest process out of everything that you need to do, but if we get this right then it makes the rest of it so much easier.
Please continue to follow this thread, this will be a fantastic journey fro the start of a Kontakt instrument, straight to the completion.
but for now, if you’d like to support me then why not consider purchasing one of my products below. Each sale really does help me to create more content and instruments at an affordable price point.
Violin Swells 2.0 – This is the second iteration of the Violin Swells family – a revisited evolution of the original. This will add tonnes of variation in your Pieces. This promo Code will give you £10 off the retail price in the checkout. Promo Code: 10off
Violin Swells 1 – this is the original instrument that was created. this instrument brings simplicity and smooth marcato swells to your pieces to add pad like swells behind your tracks. This promo Code will give you £5 off the retail price in the checkout. Promo Code: new2020
If you’d like to follow me on my social media, here are some links for you!
Facebook
witter – @GeoffCharlesEv
Instagram – themediaman09
Soundcloud – @geofcevans
Thank you so much for all of your ongoing support and I’ll post the next in the series in the next few day!
Happy Composing,
Geoff.
The Media Man Productions.
